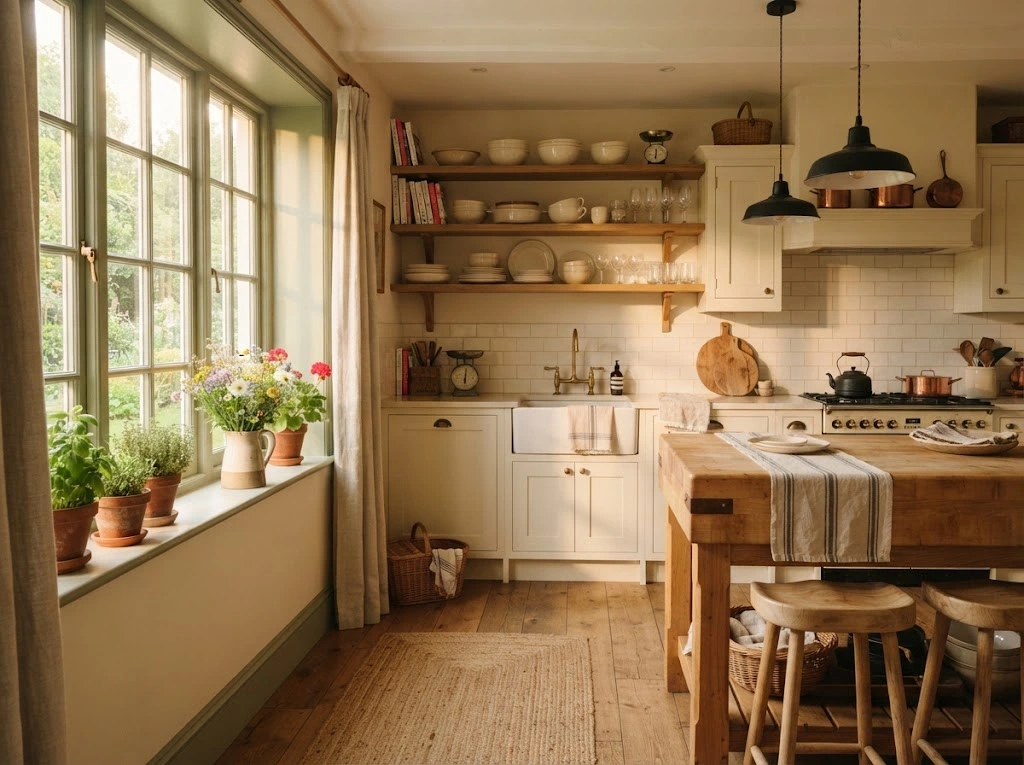
Some kitchens make you want to stay. The kettle is warm, the table is worn in all the right places, and somebody is always pulling up a chair. A farmhouse style kitchen creates that feeling without needing a huge budget or a full renovation.
If your own kitchen feels cold, cramped, or a little too plain, you are not alone. I’ve noticed that most people do not need a bigger room. They need better texture, softer light, and a few smart pieces with character.
In this article, you will find 23 practical ideas, from paint colors and lighting to storage and small vintage touches. Each one is simple enough for beginners and easy to save for later. Start with one idea and see how the room begins to feel.
Open Shelving Display
Cabinet doors hide the good stuff. Open shelves show it off. I swapped two upper cabinets for rough oak boards in my own kitchen, and the room felt lighter within a day. Start with everyday pieces you already reach for, like white plates and glass jars.
Keep the grouping simple. Stack plates in short piles of four, line up bowls by size, and leave a few inches of bare wood between items. Breathing room makes the shelf look styled instead of crowded, and it keeps dusting quick for busy weekdays.
Apron Front Sink
- Big pots finally fit. A single basin that is 9 to 10 inches deep keeps splashes inside the sink.
- Pick fireclay for a classic look, or stainless steel if you want fewer chips.
- Measure your cabinet base first, because an apron sink needs a reinforced, custom-cut front.
- Pair it with a bridge or gooseneck faucet in brass, black, or nickel.
Washing up feels different at a sink like this. In my experience, the wide front lets you lean in without soaking your shirt, and the deep bowl hides dishes when guests arrive. It becomes the focal point of the room, so keep the counters around it clear.
Butcher Block Counters
Quick Tip:
Seal wood counters with food-safe mineral oil once a month for the first three months, then every few months after. Wipe spills right away, especially around the sink. Water left sitting is what causes dark rings.
Wood adds instant warmth to any farmhouse style kitchen. Light scratches and dings only add to the lived-in charm, and they fade with regular oiling. Pair butcher block with white cabinets for contrast, or with dark green ones for a moodier cottage feel.
Whitewashed Shaker Cabinets
BEFORE: Dark, dated cabinets soak up light and make the kitchen feel smaller than it is. Glossy finishes show every fingerprint, and the whole room feels heavy.
AFTER: Soft white shaker doors bounce daylight around the room. The flat panel style looks calm and classic, and matte paint hides everyday smudges.
Paint is the budget route. Sand lightly, prime with a bonding primer, and finish with two thin coats of cabinet-grade paint. I’ve seen this work well on tired oak cabinets, especially when you swap the hardware for black or aged brass pulls at the same time.
Vintage Pendant Lights
- Measure your island or table length, then plan one light for every 30 inches of surface.
- Hang the bottom of each shade 30 to 36 inches above the counter.
- Choose warm white bulbs around 2700K so the glow feels soft, not clinical.
- Install a dimmer switch so you can go from bright prep light to candle-like dinner light.
Lighting sets the mood before anyone sits down. Barn shades, glass domes, and enamel cones all suit the style. I’d pick one finish, like black or aged brass, and repeat it on cabinet hardware so the room feels pulled together. Evening cooking suddenly feels like an occasion.
Reclaimed Wood Table
| Reclaimed Wood | Laminate Look-Alike | |
|---|---|---|
| Character | Real knots, nail holes, and grain | Printed pattern that repeats |
| Repairs | Sands and refinishes many times | Chips cannot be fixed |
| Upfront Price | Higher | Lower |
| Care | Wax or oil twice a year | Wipe clean |
A table this size becomes the heart of the house. Homework, bread dough, and Sunday jigsaws all end up on it. Slightly imperfect surfaces are far easier to live with than flawless ones, especially with kids. Choose a matte finish and rotate the chairs so wear spreads evenly.
Gingham Window Curtains
Do:
- Hang a café rod at the halfway point of the window so light still enters from the top.
- Choose washable cotton or linen.
- Pick a small check, about half an inch, for a classic look.
- Sew tab tops or clip rings so the fabric slides easily.
Don’t:
- Skip heavy velvet or thick lined fabric, which blocks light.
- Mix more than two patterns near the sink.
- Let the hem touch the faucet or sit where water splashes.
Fabric softens all the hard surfaces around a sink. Gingham brings a gentle pattern without shouting for attention. I’ve noticed that a half-height curtain keeps privacy while still letting sunshine reach your plants. Wash it every few weeks and iron while slightly damp for crisp lines.
Vintage Enamelware Collection
Cost: Low to medium | Time: One weekend of thrifting
Skill Level: Beginner
Best For: Open shelves, stovetop corners, and small kitchens
Where to Look: Flea markets, estate sales, and secondhand shops
Old enamel has a story you can see in every chip. Hunt for pieces with solid rims and no rust through the base. Rust spots along edges are fine for display, but skip them for cooking. Group three items in the same color family and the shelf reads as a collection.
Vintage Style Range
The stove is the first thing guests notice. A retro-style range in cream, mint, or soft black gives the room a built-in focal point without any extra decor. Modern versions offer the look with reliable gas burners and self-cleaning ovens, so you keep the charm and skip the old-appliance headaches.
Measure the opening before you fall in love. Most ranges are 30 inches wide, but vintage models can be narrower. Check the gas or electric hookup too. Pair the stove with a simple hood in white or plaster, and keep the backsplash plain so the appliance stays the star.
Woven Basket Storage
- Onions and potatoes last longer in open-weave baskets that let air circulate.
- Line a deep basket with a linen cloth to hold bread or muffins on the table.
- Tuck lidded baskets under open shelves to hide plastic bags, batteries, and takeaway menus.
- Keep a handled basket by the door for market trips and herb picking.
- Tie small tags on with twine so everyone in the house puts things back.
Baskets solve clutter and add texture at once. I’ve found that three sizes work best: one large, one medium, one small. Stay within the same tone of straw or rattan so the group looks intentional. Skip plastic liners and use cotton instead, since it lets food breathe.
Handmade Tile Backsplash
Quick Tip:
Choose a warm white grout, not bright white, so the tile looks aged rather than new. Order 10 percent extra tile for cuts and future repairs. Seal the grout behind the stove, where splatters land most.
Slightly uneven tile catches light in a way flat tile never does. I’ve noticed that the small ripples and color shifts hide fingerprints and water spots better than glossy machine-made squares. Keep everything else around it calm, like plain counters and simple hardware, so the wall does the talking.
Beadboard Paneling
BEFORE: Plain drywall scuffs easily from chair backs and bags, and the lower half of the room looks flat. Bare walls also echo sound, so the kitchen feels colder than it needs to.
AFTER: Vertical grooves add texture and depth right at chair height, where it counts. Painted panels wipe clean and protect the wall from daily bumps.
Pre-cut beadboard sheets cost far less than tongue and groove planks, and they glue up in an afternoon. Aim for panels about 32 to 36 inches high and finish the top with a simple ledge. Semi-gloss paint keeps wipe-downs easy. Muddy paws and backpacks stop being a worry.
Windowsill Herb Garden
- Pick a window that gets at least six hours of light. That means south-facing in the US, UK, and Canada, and north-facing in Australia.
- Choose terracotta pots with drainage holes and set each one on a saucer.
- Start with forgiving herbs like mint, chives, and parsley. Give thirsty basil its own pot.
- Water when the top inch of soil feels dry, and turn the pots a quarter turn each week.
Snipping fresh basil into pasta is a small joy. I’ve grown herbs on sills for years, and the pots that get picked most often always stay closest to the stove. Harvest from the top so plants grow bushier. Fresh leaves also add color to the counter all year long.
Hanging Pot Rack
| Ceiling Rack | Wall Rail | |
|---|---|---|
| Space Needed | Open area above an island | One empty stretch of wall |
| Weight Held | Heavy cast iron, if bolted to joists | Light to medium pans |
| Install Effort | Needs a ceiling joist | Needs studs or strong anchors |
| Look | Bold centerpiece | Tidy and low profile |
Deep cabinets swallow big pans, and you dig for them every night. Hang them overhead instead. Always screw into a ceiling joist, never plain drywall, since a full rack can weigh over 40 pounds. Hang heavy pans low and lighter ones high. Keep favorites within easy arm reach.
Vintage Runner Rug
Do:
- Leave 6 to 8 inches of bare floor on each side of the runner.
- Choose a low pile that lets doors and drawers open freely.
- Add a non-slip pad cut slightly smaller than the rug.
- Pick faded or patterned designs that hide crumbs and drips.
Don’t:
- Place a fluffy shag rug where spills happen.
- Buy a runner shorter than the sink or stove run.
- Skip the pad, which lets rugs slide and corners curl.
Hard floors feel cold at six in the morning. A runner gives tired feet something soft while you stand at the counter, and it hides the scuffs that pile up in busy walkways. Machine-washable versions are worth the small extra cost. Rotate it every few months so wear stays even.
Freestanding Kitchen Island
Cost: Medium | Time: One afternoon to assemble
Skill Level: Beginner
Best For: Kitchens with 36 inches of clear walkway on every side
Result: Extra prep space and casual seating
A rolling island earns its keep on day one. In my experience, a butcher block top on a painted base gives you a prep zone, a coffee bar, and a spot for kids to sit and do homework. Add locking casters so it moves for parties. Leave 36 inches on every side.
Glass Front Cabinets
Closed doors can still show off your best pieces. Glass front cabinets let you display white dishes and glassware while keeping dust off. I’ve noticed that just two glass doors on an upper run make a solid wall of cabinets feel lighter and less boxy.
Choose seeded or wavy glass if your shelves get messy. The texture blurs clutter but still glows when the lights are on. Add battery puck lights inside, line the back with beadboard, and group items by color. Keep the heaviest plates on the bottom shelf so doors close easily.
Cake Stand Display
- Height turns clutter into a display. Set a tiered stand on the counter to gather lemons, eggs, or a butter dish in one spot.
- Lift a glass dome over fresh scones so they stay soft and look bakery-ready.
- Place a single stand by the kettle for tea bags and a small jar of honey.
- Swap the contents with the seasons, like apples in autumn and peaches in summer.
- Look in thrift shops for milk glass and pedestal stands, which often cost only a few dollars.
Counters look flat until something rises above them. I’ve tried a single milk glass stand beside the kettle, and it changed the whole corner. Stick to one or two stands per counter. Wash them by hand and use felt dots underneath to protect your wood counters.
Sage Green Cabinets
Quick Tip:
Tape paint swatches on a cabinet door and check them at morning, noon, and evening. Sage can turn gray in cool light and minty in warm light. Pick the shade that stays soft in all three.
Green feels like the garden came inside. In a farmhouse style kitchen, a muted sage pairs well with cream walls, oak floors, and brass pulls. I’ve seen it calm busy rooms fast. Choose satin paint for wipe-clean doors, and keep the countertop pale so the color stays gentle.
Chalkboard Menu Wall
BEFORE: A blank wall by the fridge collects takeaway flyers and stray sticky notes. Nobody remembers what is for dinner or who needs a lift on Thursday.
AFTER: A framed chalkboard holds the weekly meal plan, the grocery list, and one small doodle. Everyone checks it, and the paper clutter disappears.
Chalk paint on a wall panel costs very little. Paint a rectangle in matte black, let it cure for three days, then rub chalk over the surface and wipe it off to season it. Frame it with scrap wood. Write in liquid chalk markers for bold lines that still erase.
Exposed Ceiling Beams
- Check your ceiling height first. Beams hang down 3 to 5 inches, so they suit ceilings of 8.5 feet or taller.
- Choose hollow box beams made of pine or lightweight polyurethane. They look like solid timber and are easy to lift.
- Find the ceiling joists with a stud finder and mark them in pencil.
- Fasten each beam into the joists with construction adhesive and screws, then fill the holes with matching wood filler.
- Stain them walnut or oak, then seal with a matte finish.
A plain ceiling can feel like wasted space. Beams give it age and character in a single weekend. Box beams fool most guests into thinking they are centuries old. Space them 3 to 4 feet apart and run them across the short side of the room. Keep walls light so the wood stands out.
Dried Flower Bundles
| Fresh Flowers | Dried Bundles | |
|---|---|---|
| Lifespan | 5 to 7 days | Months to years |
| Ongoing Cost | Weekly purchase | One-time or free from the garden |
| Care | Change water daily | Dust lightly now and then |
| Best Spot | Table centerpiece | Beams, hooks, window frames, shelves |
Dried stems keep the garden feeling close through winter. Hang small bunches upside down in a dry, dim spot for two weeks, then tie them with twine. I’ve kept lavender bundles going for two years above my window. Keep them away from the stove, where steam and grease soften the stems.
Antique Hutch Storage
Do:
- Measure doorways and ceiling height before you buy, since hutches are tall.
- Fix an anti-tip bracket to the wall stud.
- Store heavy dishes on the lower shelves and delicate glass higher up.
- Line the shelves with cotton or paper to protect the wood.
Don’t:
- Buy a piece with a musty smell or soft, rotting wood.
- Sand old paint without testing it for lead first.
- Overload shelves until the boards start to bow.
- Place it beside the stove, where heat and grease warp the wood.
A single freestanding hutch can replace a whole run of wall cabinets. Secondhand ones are often solid wood and cost less than new flat-pack units. Every farmhouse style kitchen I’ve loved had one piece with a past. Check for wobble, then repaint in chalky white or soft blue.
Final Thoughts
You do not need to change everything at once. A painted cabinet, a warm pendant light, or a basket of fresh herbs can shift the mood of the whole room. That is the beauty of a farmhouse style kitchen: it grows slowly and gets better with use. I’ve seen how small changes like these can completely shift the way a space feels.
Save this post on Pinterest so your favorite ideas are easy to find later. Pick one or two to try this month, then share the article with a friend who is dreaming of a cozier kitchen. Your warmest room starts with one small step.